Debian 13 “trixie” installation
Installing Debian using “a small installation image” (netinst: Network install).
The image is available from the Debian website.
https://www.debian.org/distrib/
For the detailed installation guide, see the Debian installation manual. https://www.debian.org/releases/stable/installmanual
Installer configuration
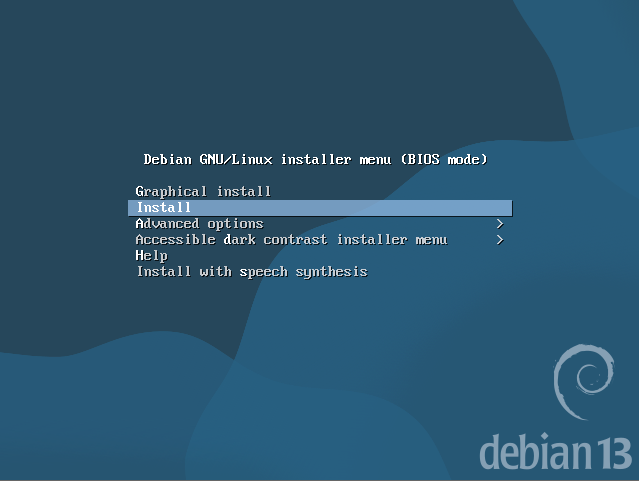
Installer menu
Choose “Install” instead of “Graphical install.” The keyboard should be enough on the simple installation screens.
Select a language
Choose “English - English”. As described on the screen, this will be the system’s default language. English will be the safest choice in an emergency situation (e.g., accessing from a very limited environment).
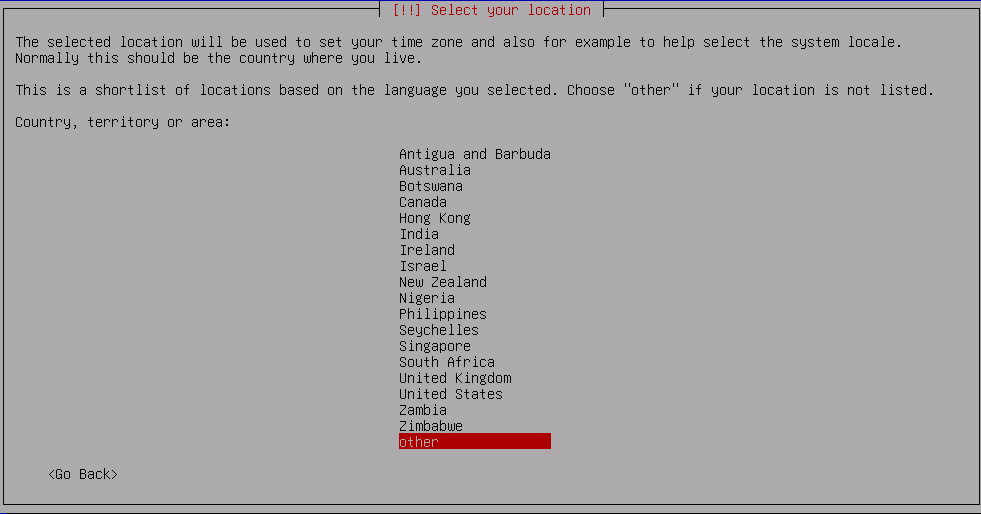
Select your location
This will determine the system timezone. This doesn’t have to be the actual server location.
If your choice is not in the first list, you can find more options from “other” at the bottom.
Configure locales
You will be asked to choose one if the installer can’t automatically guess the locale.
“en_??.UTF-8” is recommended as a safe choice.
Configure the keyboard
Choose the keyboard layout you’re using now.
Configure the network
Network interface
If the server has multiple network interfaces, choose the one that is connected to the Internet. The installer will automatically detect the network interfaces and show them in the list.
Network configuration method
If DHCP is on, the installer will automatically configure the network. However, the server should have a static IP, and manual configuration will be required.
- IP address
It accepts both IPv4 and IPv6. If the server has both v4 and v6 addresses, set v4 here and add v6 after the installation. - Netmask
It should be something like255.255.255.0or255.255.254.0. - Gateway
Configure the IP specified by your server provider. - Name server addresses
List all name servers separated by a space, not a comma.
192.168.0.10 192.168.0.11 - Hostname
The first part of the server’s FQDN. Thehostnamepart ofhostname.example.com. - Domain name
Theexample.compart ofhostname.example.com.
Set up users and passwords
Set the root password and create a new user.
- Root password
rootis the administrator with all privileges. This password must be kept secret and should not be used often, but never forget it. - Full name for the new user
This doesn’t have to be your real name. Anything goes. - User name for your account
This will be the actual account name, which will be your primary mail address. (You can add aliases for email, though.) - Choose a password for the new user
This password should be different from the root password. This will be required when yousudo.
Partition disks
Guided - use entire disk should work fine for most casual cases.
In my case, I used Manual configuration to consider the following factors.
- More swap to cover the lack of main memory
Due to the limited memory of a small VPS, there is insufficient memory for peak usage. Swap will be required.
(If you don’t need to make any other partitions, aswapfileis the modern approach instead of a swap partition.) - XFS for MongoDB
MongoDB requires an XFS filesystem for data storage.
(The loopback mount file on an ext4 filesystem works, but it is not recommended due to the performance concerns.)
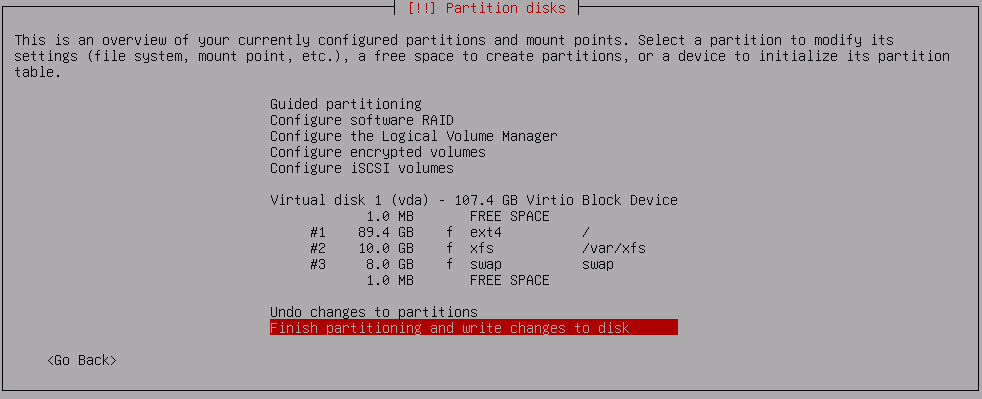
(Never mind about 1.0 MB free spaces. They are automatically generated for some reason.)
Configure the package manager
Choose the country nearest to the server location.
- Scan extra installation media
Choose “No” to continue. Required packages should be downloaded from Debian mirrors. - Debian archive mirror country
You must consider where the physical server is located because it should access the nearest Debian mirrors. - Debian archive mirror
There will be a list of Debian mirrors in the country you choose. Choose the one that is suitable to your network environment.
If you don’t know which one to choose, select the firstdeb.debian.orgmirror. - HTTP proxy
This will be required only if you’re in the restricted network.
Configuring popularity-contest
If you wish to contribute, choose “Yes” to provide the anonymized package usage data to help Debian developers.
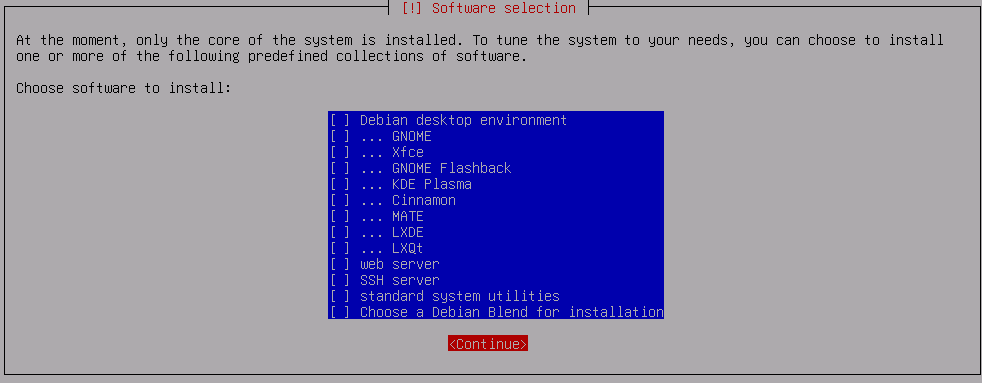
Software selection
Choose nothing (unselect all). Even without “standard system utilities”, it will still install “required” utilities.
You can check what is in “standard system utilities” later with this command.
tasksel --task-packages standard
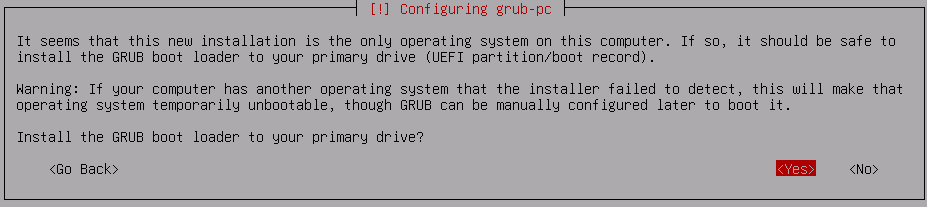
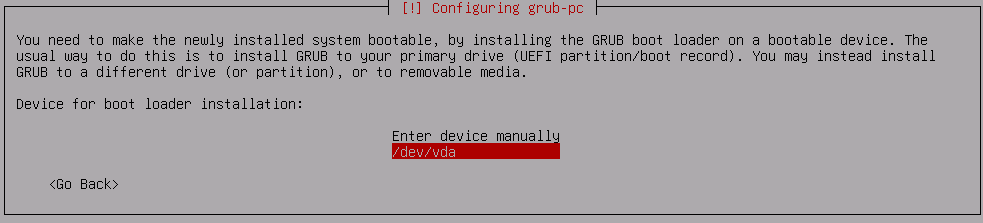
Configuring grub-pc
The “server” should have only one OS (Debian), so the GRUB boot loader should be installed into the primary drive.
Finish the installation
Installation complete. Continue to finish the installation and remove the install media before rebooting.
First login
Login as root to configure basic settings.
Modernize apt-line (optional)
A new format (deb822) apt-line is recommended since Debian 13, but not installed by default.
Login as root and migrate with the following command.
# apt modernize-sources
The old format apt-lines will be added to install some software. You can redo this command to modernize them. (The apt command works even if there are old format and modern format mixed together.)
Update fstab
Update /etc/fstab.
- Add
noatimeto XFS mount options for performance (because this partition is dedicated to MongoDB) - Remove
/dev/sr0cdrom mount point (used only for the installation)
# <file system> <mount point>   <type>  <options>       <dump>  <pass>
# / was on /dev/vda1 during installation
UUID=(snip)     /               ext4    errors=remount-ro 0       1
# /var/xfs was on /dev/vda2 during installation
UUID=(snip)     /var/xfs        xfs     defaults,noatime  0       0
# swap was on /dev/vda3 during installation
UUID=(snip)     none            swap    sw                0       0
Restart the server to apply the changes.
# reboot